One of the primary challenges that always crops up when discussing digital zoom for cameras is how to maintain the detail of a video feed, while still achieving a significant and meaningful image magnification. You need increased visibility on a particular area of interest, but can’t afford to sacrifice any image quality.
To help with this challenge, the sensor crop feature on Cisco Meraki MV cameras allows users to isolate regions of interest and achieve up to a 2.1x magnification on that region of their video stream, without any loss of detail or stretching of pixels.
How sensor crop works
This lossless zoom is possible because of the hardware capabilities of the new generation of MV cameras.
Capturing at a full 4MP, MV cameras have an excess of pixels while streaming at 720p or 1080p, meaning the video is downsampled by default to fit the streaming resolution. This downsampling is illustrated in the diagram below.
Enabling sensor crop allows you to isolate any region from the 4MP sensor and have the camera only record that selection, rather than downsample the raw footage. So, if you select a 1080p-sized frame for your crop, your camera will now only record and stream from that region, but it will do so in full 1080p. This cropping is what results in the zoom.
By adjusting the camera sensor itself, zooming is achieved without any pixels needing to be stretched, as they are with digital zoom, and without any movement of the lenses, like with optical zoom.
How to get sensor crop setup on your MV cameras
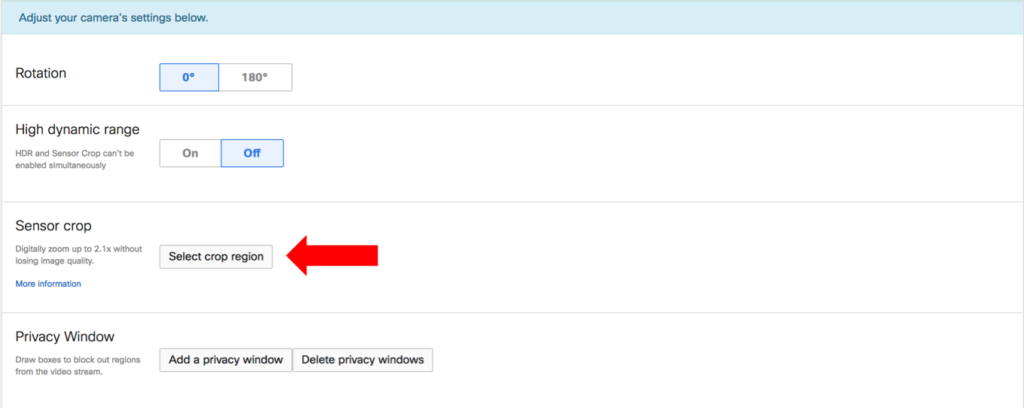
First, navigate to the video stream for the camera you’d like to crop, and select the “Settings” tab, then “Video Settings.”
Below the video player, there will be a “Sensor Crop” section — click the “Select crop region” button. Note that sensor crop cannot be applied while High Dynamic Range (HDR) is enabled, and vice versa.
Your video player will now have a crop-region selector overlaid. By clicking on the selector, you can move it around the frame to target a particular area of interest, or cut out unnecessary portions of the field of view. You can also resize the selector using the green square in the bottom-right corner.
Once you’re happy with the selected region, scroll down and press “Apply crop region.” And that’s it!
This crop may take a few minutes to actually be applied, and it can be removed at any point.
What do you plan to use sensor crop for? Tell us all about it over on the Meraki Community!