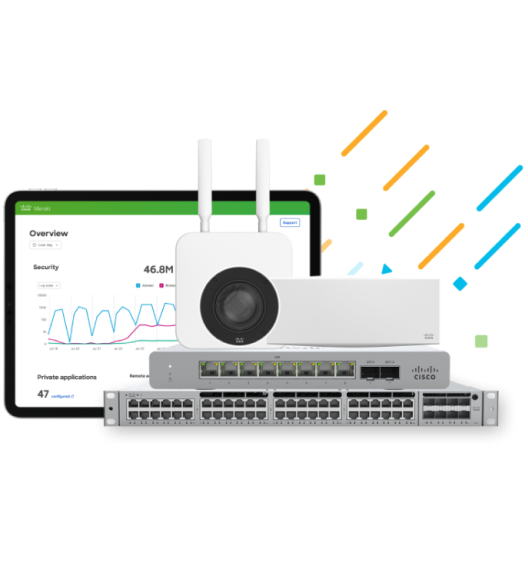
Organizations are preparing for a digital future faster than ever before. More than half a million customers, including a majority of the Fortune 100, have now modernized their networks with Cisco Meraki. Cloud-management has created a fundamental shift away from on-site controllers, time-consuming troubleshooting, and complex security to a model that can be operated 100% remotely. To help organizations on this journey, we are doubling the size of our Wi-Fi CERTIFIED 6™ family by releasing three new Wi-Fi 6 access points, adding enhanced troubleshooting capabilities, and additional security features.
The new Meraki Wi-Fi 6 Family
New Wi-Fi 6 access points
Organizations are experiencing increases in the use of bandwidth-hungry mobile video conferencing, Wi-Fi calling, and mobile device use. Wi-Fi 6 helps to deliver these mobile experiences seamlessly, and now Meraki can deliver Wi-Fi 6 both indoors and outdoors.
We are happy to announce three new Wi-Fi CERTIFIED 6™ ruggedized and external antenna access points to deliver the newest Wi-Fi 6 standard to outdoor areas, and focused coverage areas. The MR46E, MR76, and MR86 join the MR36, MR46, and MR56 to offer screaming fast, high-performance Wi-Fi 6 everywhere.
MR46E, MR76, and MR86 Highlights
All three models are Wi-Fi CERTIFIED 6™, supporting high-density features such as MU-MIMO, OFDMA, and power saving features such as target wake time (TWT). They all feature a quad-radio architecture with 2.4 GHz, 5GHz, security scanning, and IoT radios.
MR86 is an IP67 rated, rugged 4×4:4 Multigigabit access point, with a 3.5 Gbps max data rate for high-density outdoor environments
MR76 is an IP67 rated, rugged outdoor 2×2:2 access point with 1.7 Gbps max data rate
The MR46E is a 4×4:4 Multigigabit access point, 3.5 Gbps max data rate, with automatically-detectable external antennas. MR46E can re-use the same external antennas as MR53E.
The new outdoor access points enable organizations to extend Wi-Fi beyond current dense indoor areas. Retail shops or schools may be wanting to offer more Wi-Fi outdoors to accommodate social distancing. MR46E is able to offer focused wireless coverage, using directional antennas, for warehouses or manufacturing plants with high ceilings, or hospitals and schools with long hallways.
Simplifying wireless troubleshooting
As discussed in a recent blog post, Meraki dramatically simplifies the ability to troubleshoot a network from end-to-end. We are now excited to release deeper insights and analytics into wireless performance metrics. With historical color-coded performance metrics for signal quality and wireless latency, identifying and correlating problems has never been easier.
Want to know how your CEO’s Wi-Fi was performing today, yesterday, or even weeks ago? Want to know the impact a configuration change had on wireless latency or signal quality at one of your remote locations? It’s now all at your fingertips with expanded Meraki Health statistics.
Client Health Signal Quality
Simplifying security
By deliveringCisco security technologies from the cloud, Meraki helps organizations get back to what they do best. The newest wireless firmware release includes security capabilities to help secure their networks.
Adaptive Policy is now available on Wi-Fi 5 and Wi-Fi 6 access points, to help simplify policy administration using SGTs (Secure Group Tags). Profiling users, devices, services, and setting time of access has never been easier.
Identity PSK is now available without the need for a RADIUS server. IoT devices can be authenticated using the Meraki cloud.
WPA3 is now available across Wi-Fi 5 and Wi-Fi 6 access points, which enables higher levels of encryption and more robust password-based authentication. This will be a welcome upgrade for organizations with sensitive data such as financial services and healthcare organizations.
New firmware upgrade option
To help simplify firmware upgrades, Meraki has released a new upgrade strategy to minimize client downtime. The network never has to go offline during a firmware upgrade, minimizing impact on end-users and devices are minimized during the upgrade. This new upgrade strategy option helps minimize disruption to mission critical wireless networks such as manufacturing, healthcare, warehouses, and airports.
Wi-Fi 6 is designed to support a modern world of hyper-connectivity. While exciting, this digital world will also see more challenges such as high client density, IoT everywhere, and more high-bandwidth requirements. This leads to increasing demands on the network, and organizations relying on connectivity more than ever before. One of the most important challenges a network faces is maintaining the relationship between the clients and the wireless network.
Many will agree that a great relationship is built on a strong foundation. For the wireless network, this foundation might be careful capacity planning and a proper site survey. But, even with a strong foundation, relationships between wireless clients and the network can hit rough patches. Without knowing the root-cause of the problem, it can be hard to improve that relationship.
Many wireless network engineers today spend at least a day every week troubleshooting Wi-Fi. This can be due to lack of visibility, increased network complexity, and human error. Time spent troubleshooting is a missed opportunity, as those countless hours could have been spent transitioning IT to meet modern organizational needs.
Visibility beyond wireless
This week, we are adding new capabilities and visibility to the Meraki dashboard to help simplify troubleshooting. Users can now pinpoint issues more quickly, and ensure excellent connectivity for clients. These updates are designed to not only provide insights about the health of Wi-Fi clients, but also to provide end-to-end visibility. Enhanced visibility will now allow for immediate identification of whether wireless is problematic, or if, for example, an upstream device is misconfigured.
Cisco research reveals that 63% of users blame the wireless network for problems, while the issue could be elsewhere. Now, network admins can gain insight and focus precious time on the actual root cause.
Once problematic clients or access points are identified, new snapshots are available to help quickly remedy the root cause. Users can now view wireless health metrics as they navigate through their dashboard. From an individual client’s page, a user can immediately assess the health of that specific client.
Below is an example of how to troubleshoot a troublesome wireless client with Meraki:
The end-to-end visibility snapshot, health snapshots for individual access points and clients, as well as updated event logs are all available today for Meraki Wireless users. These new metrics and capabilities, along with the centralized Wireless Health engine make the process of optimizing connectivity simple.
One of the most compelling benefits of cloud networking has to be the ability to troubleshoot technical issues remotely. Network engineers out there know that obtaining packet captures, an essential tool in the troubleshooting arsenal, can quickly consume time and money when supporting remote offices. Traditionally, an engineer needs to be physically present where the data is moving in order to “tap the wire” and capture detailed traffic for analysis.
In 2012 we solved this problem by giving engineers the ability to take detailed short-burst packet captures on any device in any location served by Cisco Meraki equipment. Combined with our remote cable testing feature, packet capture in the Cisco Meraki dashboard makes it far simpler to support networks on branch sites where dedicated IT resources may not be available.
The basic results of packet captures can be presented directly in the dashboard, but for more thorough data analysis, a .pcap file can be downloaded onto the engineer’s computer and opened with software like Wireshark (formerly known as Ethereal). If you haven’t worked with one before, you’ll be amazed at the detail contained in a .pcap file. It reveals everything that is passing through—from soup to nuts.
Now we’ve gone a step further and removed the need for local software by working with a new cloud service called CloudShark. Detailed packet captures can now be displayed directly in a web browser on any device.
Selecting CloudShark
Using CloudShark with Merkai is super easy. By default, any capture sent to the service is immediately viewable in the browser on CloudShark’s own website. If you’re already familiar with Wireshark, you’ll be right at home here. Here’s a sample :
Example Cloudshark Capture
If all of this detail looks overwhelming, the service includes analysis tools for helping you find that elusive needle in a haystack.
CloudShark Analysis Tools
CloudShark also offers the option to host its software locally on your own server. This provides significant additional benefits, useful in larger organizations where many captures may be taken routinely and there may be a requirement to retain this data for future use or compliance purposes. With CloudShark’s Appliance software you can
Build a searchable repository of capture files
Tag captures to associate them to a location, device or trouble/support ticket
Annotate packets and captures
Securely collaborate on encrypted packet captures
Manage user access, even integrating with LDAP/AD
Setting up an Appliance is easy, just download it and install. Add the URL and unique API token to the Cisco Meraki dashboard, and all captures will go directly from the Cisco Meraki cloud to the CloudShark Appliance, encrypted all the way from your Access Point, Security Appliance, or Switch.
When you get a call from a wireless user complaining about connectivity problems, what is one of the first questions you might ask? “Where are you exactly?” Knowing precisely where a user is located can be immensely helpful in diagnosing and troubleshooting issues. What AP are they associated to? Are they behind a pillar that could be blocking their wireless signal? Are they in an area of a new building where the network is currently being expanded and might still have some coverage weak spots? This knowledge can often provide an administrator with a good idea of where they should dig in to properly troubleshoot the issue.
Starting today, administrators of Meraki Enterprise networks won’t have to ask where a client is because they’ll know: introducing Meraki Location-Based Services. On each client details page you’ll notice a new map where the current location of the client is clearly indicated on either a Google map or building floorplan (see below screen shot).
In addition to troubleshooting client issues, there are many other situations where being able to pin down a client device’s location can be very useful to administrators, such as tracking down a lost laptop or monitoring a nurse’s progress doing rounds in a hospital with the medicine cart. Typically these capabilities might require additional appliances and third-party software costing $10,000’s, but with Meraki they are provided with all Enterprise networks at no additional cost and without the need to deploy additional gear.
When combined with other Dashboard features like “remote hands” tools and detailed reporting with Traffic Shaper’s application-level visibility, Location-Based Services provides administrators with powerful tools to understand exactly how their network is being used and to quickly troubleshoot client issues remotely. Please let us know what you think of this new feature using the Make a Wish box!
If a client is having trouble associating to your Meraki Enterprise wireless network, one of the best troubleshooting tools at your disposal is the event log. You can find the log under Monitor -> Event log and see a detailed log of exactly what has been going on with your network.
The log captures various types of traffic on your network that can be very useful for troubleshooting:
802.1X – Authentication communication between the client and RADIUS server.
IP (Data) – Initial requests and responses between computers and servers, including HTTP.
802.11 – Association and disassociation of clients from the network.
DHCP – Lease information from the DHCP server about the client IP address, default gateway, and DNS server.
WPA – Password authentication of the client.
ARP – Requests by clients to find the MAC address associated to an IP address.
If a client is having trouble associating to the network, the event log can help you determine the most likely culprit. For example, you can easily tell if it’s related to a bad password or a failure to obtain an IP address and take the appropriate steps to get the user up and running again.
If you’d like to see more information captured in the event log, let us know by entering your feedback in the “Make a Wish” field on the Dashboard.
We’re happy to share that we’ve launched the Meraki Network Simulator: a free demo version of the Meraki Enterprise Cloud Controller that allows you to try out all of our web-based tools without purchasing or setting up physical access points. For a long time, we’ve wanted to enable potential customers to test out the Meraki Dashboard without physical hardware. The Meraki Cloud Controller is the most unique piece of our wireless LAN offering, providing simple centralized management to network administrators any time and any place over the web. You really have to experience it personally to understand why it’s such a revolutionary way to manage your network.
The Meraki Network Simulator contains several sample networks that allow you to see how Meraki could work for you. We’ve even populated the Cloud Controller with real-life data that we’ve captured and anonymized, so you can get a realistic picture of how the Meraki Dashboard looks on a live network. Here’s a taste of what you can do with the simulator:
Test-drive the Meraki Enterprise Cloud Controller for free, without purchasing hardware
Experience the complete Cloud Controller configuration UI
Test-drive Meraki’s network monitoring features
Try out sample networks for office, university, and conference use cases
Create your own blank network simulation and set it up from scratch, configuring simulated access points
Frequently when using my Meraki Dashboard account, I find that I’m interested in more information than is displayed by default on the Dashboard. This may be true for Access Points, Clients, or Logons. The “Display options” link on these pages is a little button with big value to help me learn more about my network.
Here is the link on the Access Points page:
Click on the link to discover the fields that you can display:
Add those fields that are most helpful to you and hide the fields that you don’t need. This way you can display the information that provides the most value to you while eliminating unnecessary clutter.
There are plenty of great ways to use this data to trouble shoot. For example, when there is a connectivity issue on a portion of a network, I add the Gateway field and sort the APs by gateway. Frequently I discover that the outage is associated with a single gateway… that tells me to look at the wired network and ISP service supporting that particular gateway. There are many other ways to sort these fields that can help you to better understand your network performance and behavior.
We hope this helps make your Dashboard experience even better. We’ll periodically share our favorite Dashboard features with you to help you make the most of the troubleshooting tools at your disposal.
Have you ever been out there troubleshooting a wireless issue and wishing you had more diagnostic tools at your disposal? Check out http://my.meraki.com when you’re wirelessly associated to a Meraki network. This web site provides useful information about your wireless environment and the specific Meraki access point (gateway or repeater) to which you are connected.
Check out the screen shot below to see all of the cool tools available on the different tabs of my.meraki.com.
The Access Point Status tab reveals basic information about the access point:
– MAC address
– Name
– The network it’s a member of
– Connectivity to Internet
– Connectivity to the cloud controller
– Firmware
The Client Survey Tool tab shows real-time spectrum analysis and client signal strength. The spectrum data comes in handy when you’re researching potential interference from other RF sources, e.g. non-Meraki access points, 2.4 and 5 GHz cordless phones, leaky microwaves, etc. Use the signal strength data to calculate the RF propagation and coverage area of the access point. Perform a quick and easy site survey with these tools by powering the access point with a battery pack:
1. Wirelessly connect to the Meraki network from a laptop.
2. Browse to http://my.meraki.com.
3. Walk around with the battery-powered access point, closely watching the spectrum analysis and signal strength readings in the web browser.
You can even run a quick speed test from the access point to the laptop. In this test, the access point creates and sends data packets to the laptop from itself; these data packets are not coming from the wired network. For example, if you’re experiencing speed problems, but you get blazing speed during this wireless test, then you know the RF side is not contributing to the problem, allowing you to focus on the wired network instead.
The Mesh Neighbors tab displays a table containing data about each of the nearby Meraki access points:
– Name
– MAC address
– Signal Strength
– Percentage of packets successfully forwarded (transmitted)
– Percentage of packets successfully received
– Distance from the neighbor to the access point to which are you connected
If you happen to be looking at a gateway, you can also see the repeaters in its mesh route(s). This information is very helpful when optimizing network design to maximize coverage and link signal strength.
Finally, the Static IP Configuration tab let’s you configure the IP address settings for the access point.
These tools are very useful when you’re deploying and/or troubleshooting Meraki wireless networks. They can be used to resolve a number of problems, including connectivity, speed, interference, signal quality, and coverage.
What other tools do you think we should include on this page? Let us know!