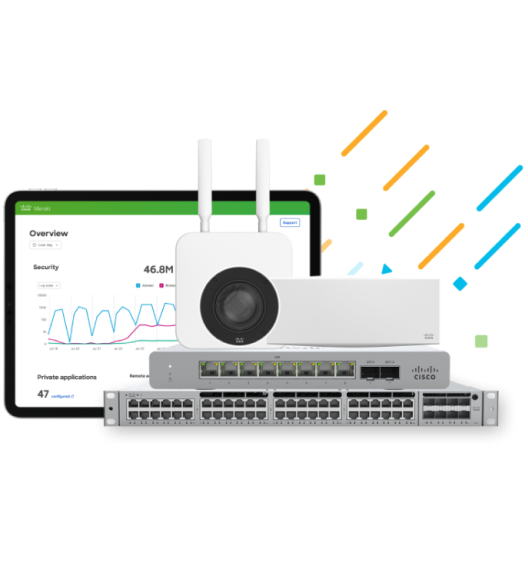
In adopting digital transformation, businesses increasingly rely on connecting cloud-specific services. The ongoing pandemic has necessitated, and in many cases, speed this adoption. By leveraging technology, businesses are likely to continue looking for ways to improve efficiency, and reduce costs, as they navigate these difficult times.
Cisco Meraki Cellular Gateway (MG) is built to address the growing demand for operational reliability and business continuity across industries. MG allows for better performance, quick provisioning, high availability, and redundancy in providing cellular wireless WAN connectivity to geographically dispersed networks.
As businesses are starting to take advantage of the advancements in cellular technology, we’re empowering them to be scalable. The shift towards the distributed application model, workforces, and software-defined technologies is leading to the increased need for API access to the network. The good news is that MG can be configured and managed using the Meraki Dashboard API!
What can the Meraki API do for your cellular WAN connectivity?
Through automation and integrations, the Meraki Dashboard API for MG enables scale, growth, and future-proofing.
Automation
IT teams can add new organizations, administrators, cellular networks, and MG devices across thousands of locations in minutes with an automation script. By automating network provisioning and bulk configurations, IT teams can minimize manual and routine tasks, freeing up time to work on more important things such as optimizing for better performance or developing modern apps. The Meraki Dashboard API also offers flexibility in cloning sites or developing templates to help you get MGs deployed easily.
Much of configuration-related set up such as DHCP, LAN, port forwarding rules, subnet pool, and uplink settings, entails repetitive tasks and is prone to human error. Network administrators spend a lot of time on these repetitive configuration and monitoring tasks that can be automated and made error-free using APIs. With MG, customers can do so via APIs to avoid manual error and service downtime—significantly reducing the management workload.
With the Meraki Dashboard API, one of our retail customers was able to rapidly automate deployment and provisioning at more than 2000 distributed locations nationwide. The resulting streamlined operations reduced overhead and costs for them.
Integration and future-proofing
The potential of the Meraki Dashboard API goes beyond faster, seamless, and cost-effective automation. Meraki API services are easy to use, easy to train staff to program with, and ripe for technology partners to continue to build native integrations on top of. For growing businesses, using these API services can significantly increase speed-to-market.
The Cisco Meraki Dashboard API is a RESTful API that uses HTTPS requests to a URL and JSON as a human-readable format. So, what does this mean for our customers? This higher software programmability using structured network data makes it easier to integrate with business logic systems. When building APIs, they can choose from a larger pool of skilled resources. Businesses can build their dashboard for store managers or specific use cases, allowing them to quickly add new services.
Visibility
Lack of end-to-end visibility is problematic when troubleshooting network issues such as high latency and jitter. By monitoring the cellular connectivity and signal strength of MG devices through APIs, IT teams can save hours of troubleshooting. Meraki APIs make our platform extensible and allow you to be agile in responding to quickly changing business needs. Meraki offers a comprehensive platform that complements out-of-the-box management and analytics for Wireless WAN deployments with the integrations and solutions powered by Meraki APIs.
Organizations across industries are eager to build their Wireless WAN infrastructure on the Meraki platform and some of them already have a head start with our new product line – MG Cellular Gateway. MG provides a solution for optimal cellular signal strength. It gives our customers the flexibility of pairing MG with any Meraki or Cisco ISR/vEdge router or 3rd party router to provide another uplink for SD-WAN, or as a failover or primary link.
MG was only launched a couple of months ago and we’re already releasing new features. There is no better way to see these features in action than to try it out for yourself.
Quick network diagnosis
We’re always seeking to provide capabilities that truly add value to our customer’s business. For cellular troubleshooting, customers have frequently told us how challenging it can get without any visibility into the signal characteristics at their site. This lack of control leads to them taking a hit on business functions that rely on cellular signals.
MG users can now take advantage of this data within the Meraki platform to quickly diagnose what’s affecting cellular connectivity, or what led to performance degradation, through historical stats— signal strength, latency, and loss—that are visual and easy to interpret. By knowing how cellular connectivity is at certain sites at any given time, it’s simple to get to the root cause of network issues. Easy monitoring of live data along with the signal level, signal quality, and connectivity data could potentially save hours of troubleshooting.
It gets even better with an API-driven architecture. MG can be managed completely through APIs, giving customers the flexibility of custom reporting and integrations that they need. Stay tuned for more updates!
How to access
From your Meraki dashboard, go to Monitor->Cellular gateways; select the MG for which you’d like to get the health data, and then go to Uplink from the menu bar. Scroll below to view the historical and connectivity data as far as 30 days in the past.
Test out the new capabilities for yourself. To learn more about the MG Cellular Gateway, you can refer to these additional MG resources:
Troubleshooting network complications can be an extremely time-consuming and difficult process. Issues such as VLAN mismatch are tough to track down among the mountain of configurations needed to get a network operational.
VLAN mismatches occur when two ends of a link are misconfigured to different VLANs. These can happen over access or trunk links. A mismatch on the link that carries the critical traffic required to keep the network functioning – the Native or management VLAN – causes additional headaches and potential security concerns.
The above image represents a native VLAN configuration where management traffic flows untagged across the switch port links normally. The image below represents a VLAN mismatch.
When the switch port on Switch 2 is misconfigured to VLAN 20, the management traffic will continue to flow between Switch 1 and 2, but any traffic returning to Switch 1 is treated as VLAN 20. This mismatched scenario could result in traffic being altogether dropped or potentially be a security concern if VLAN 20 has access to confidential data not normally accessible to VLAN 1 and the data makes it to the destination device.
Meraki uses two methods to detect VLAN mismatches. The first method is to detect if the link is configured with the same VLAN type or number on each switch port of the link. The second method is to observe if the link is identically configured as an access or trunk (multiple VLANs) connection on both sides of a switch port.
To help users spot the issue, Meraki has implemented VLAN mismatch detection that notifies users when an error is found.
The dashboard now indicates when a VLAN mismatch has occurred on a specific port and what exactly is causing the mismatch.
With the notification, users can now immediately diagnose potential issues in seconds and quickly isolate which port needs to be correctly configured.
To find more information on how Meraki handles VLAN mismatches, head to our documentation page. To learn more about all of Meraki’s safety and security features for switches, consider attending one of our upcoming webinars.
Enterprise organizations and partners spend thousands of dollars per site deploying servers for monitoring and reporting on infrastructure located on-site. With the total number of devices globally, including client devices, ever increasing and becoming more critical to business, monitoring and reporting using traditional means such as SNMP simply aren’t cost effective or scalable any longer.
While the Cisco Meraki dashboard provides IT admins a single interface to monitor and manage their Meraki infrastructure, we appreciate that not all organizations will have deployed the entire portfolio of Meraki devices across all their locations. Moreover some customers may have unique use cases that fall outside of what the Meraki dashboard is intended for. For these reasons, Meraki has been heavily investing in APIs over the last few years. To date, Meraki has hundreds of API endpoints being called over 23 million times every day across three powerful APIs: the dashboard, scanning, and captive portal APIs.
The Meraki dashboard API The Meraki dashboard API allows access to most monitoring and configuration functionality in the dashboard via a RESTful API. This allows customers and developers alike to:
Bulk provision thousands of Meraki devices and networks
Manage configurations
Build custom monitoring and reporting dashboards
Automate commonly used functionality of the Meraki dashboard
In February we introduced Wireless Health, a powerful tool that consolidates and intelligently utilizes multiple data sets to rapidly identify anomalies impacting end users’ experience. In September we added a collection of new API endpoints for Wireless Health to expand the monitoring and reporting capabilities to any external analytics system or platform.
The dashboard API is a great way to monitor and report on the state of a device, for example, over a period of time. However, if all you want to do is simply be notified when something changes, then the dashboard API might not be the most efficient way to do this. The dashboard API will perpetually ask “what’s your status” to a device and report back its findings. If calls are being made, say, every 5 minutes, that’s a lot of total responses that are being received, and likely only a handful of them will deliver useful information, i.e. when the device goes offline.
MERAKI WEBHOOK ALERTS We’re pleased to announce the availability of Meraki Webhook Alerts for all alerts within the dashboard. Setting up Webhook Alerts is very straightforward:
Add HTTP servers by defining their unique URL and shared secret [ network-wide > alerts ]
Added HTTP servers can now be selected as a recipient for any alert within the dashboard [ network-wide > alerts ]
In addition to webhooks themselves, we’re releasing new API endpoints for configuring all alert settings, which will include support for configuring the above steps via the dashboard API.
Once set up, the webhook will send an HTTP POST to a unique URL, but only when a certain condition or criteria has been met to trigger an alert. So, for example, if you’re only interested in being notified when a device goes offline, Webhook Alerting will be more efficient since it will only transmit information when the status of the device goes from online to offline.
Meraki Webhook Alerts
Meraki Webhook Alerts sends HTTP POSTs to a unique URL that can easily be fed into a receiving service. A receiving service can be as simple as a Webex Teams space, a Google Sheet logging all network alerts, or something more advanced, such as PagerDuty and ServiceNow, that can take the POSTs and create support tickets, send SMS messages to concerned parties, or even automate corrective action.
A notification of a settings change to the Meraki dashboard posted to a Webex Teams space using Meraki Webhook Alerts
Both the dashboard API and Webhook Alerts have their merits and use cases, and together offer administrators, system integrators, and developers powerful and flexible options to create custom monitoring and alerting.
Real-time alerting Webhook Alerts are fundamentally event-driven which makes them the most efficient option for setting up alerts for critical events.
“Tell me immediately when latency for any of my sites’ APs exceeds 200ms” “Tell me as soon as any Meraki device across any location goes offline” “Tell me when an important device on my network loses connectivity”
Webhooks example: real-time alerting based on a threshold or criteria
Monitoring and reporting over time The dashboard API will provide a more complete picture and historical reporting since it’s continually probing for data. It’ll be the more appropriate option to use to answer questions such as
“How many times did the latency of my access points peak above 200ms over the last week” “What was the latency of the access point in conference room 3 last Thursday at 3 pm”
The dashboard API example: continuous monitoring of a variable over time
The introduction of Meraki Webhook Alerts combined with the dashboard API means that customers and developers can now more easily address their custom reporting and alerting requirements without breaking the bank.
The pace at which new security threats are being introduced and propagated online has reached exponential levels, gaining speed with each passing year. Organizations have more locations and devices to protect, and threats are using many different ports to try to gain access or exfiltrate data. Security teams are often understaffed and struggle with complex, siloed systems that do not integrate or share intelligence in a programmatic way. These teams need solutions that are easy to deploy, simple to manage, can scale exponentially, and can integrate with other tools.
Securing your wireless users from malicious attacks — particularly these “DNS blind spots” that exist in many networks and are exploited by 97% of advanced malware — is of paramount importance. Unfortunately, recent surveys indicate that 75% of organizations do not actively monitor and apply security for DNS.
It is within this context that we are excited to announce support for integration between Meraki MR wireless access points (APs) and Cisco Umbrella (formerly OpenDNS).
Umbrella is the industry’s first secure internet gateway, a cloud-delivered first line of defense against threats like malware, ransomware, and phishing. Umbrella enforces security at the DNS layer by identifying requested web domains hosting nasty stuff — malware, phishing, etc. — and block end user access to them. Umbrella also enables more secure DNS querying through a tool called DNSCrypt, which automatically encrypts DNS queries between your network and Umbrella’s servers, effectively eliminating the chance that your queries will be the victim of eavesdropping or man-in-the-middle (MITM) attacks. This secures the “last mile” of a client’s internet connection, which is often left exposed and vulnerable.
There is no additional cost or charge for taking advantage of this integration (which is available to all Meraki wireless customers who have upgraded to our latest MR26.x firmware), but Meraki wireless customers who wish to integrate with Umbrella will need a separate Umbrella license and account with that service.
Enabling Umbrella integration
So, what does this mean for admins of Meraki wireless networks? This integration with Umbrella enables Meraki admins who obtain Umbrella licenses (WLAN, Professional, Insights, or Platform) to seamlessly assign DNS filtering via Meraki group policy or SSID to specific subsets of wireless clients, or to them all.
Enabling Umbrella integration takes only a few steps. First, the Meraki and Umbrella dashboards must be linked via the Umbrella Network Devices API key. Once this API key is generated from within the Umbrella dashboard, it needs to be copied into the Meraki dashboard by navigating to Network-wide > General.
Enabling Meraki + Umbrella integration within the Meraki dashboard.
Once the Meraki and Umbrella dashboards have been configured, linking a Meraki SSID or group policy to an Umbrella security policy is easy (note: Meraki group policies must be set to use ‘Custom SSID Firewall & Shaping Rules’ to link an Umbrella policy to them). After this initial setup, a unique identifier is generated behind the scenes for the specified Meraki SSID or group policy and is used by Umbrella to determine how to evaluate traffic from that Meraki network moving forward.
To link a Meraki SSID to an Umbrella policy, navigate to the Wireless > Configure > Firewall & Traffic Shaping section of the Meraki dashboard. There, you will find a button to link Umbrella policies.
Linking an Umbrella policy to a Meraki SSID.
By default, the last policy physically listed in the Umbrella dashboard’s ordered policy list will be inherited by a Meraki SSID unless a different policy is selected from the dropdown list.
To link a Meraki group policy to an Umbrella security policy, navigate to the Network > Configure > Group policies page in the Meraki dashboard and choose the specific Meraki group policy that you want to link. Under the ‘Layer 7 firewall rules’ section of that policy, you’ll be able to choose which Umbrella policy you’d like to apply.
Applying an Umbrella DNS policy to the Meraki ‘VIP Umbrella Clients’ group policy.
Once a Meraki SSID or group policy has been successfully linked to an Umbrella security policy, clients connecting to that SSID or who have been applied that group policy will have their DNS queries encrypted (if the AP supports 802.11ac) and verified against the corresponding Umbrella policy. Encrypting DNS queries between Meraki APs and Umbrella DNS endpoints helps secure the ‘last mile’ of client web browsing and protects against devastating MITM attacks or packet snooping that can reveal which websites client devices are browsing.
An example Umbrella policy may prohibit access to known malicious web domains or websites that host specific types of content, like gambling or peer-to-peer domains. If the client’s request for access to a given website is allowed, Umbrella will return an encrypted DNS response with the appropriate IP address. If the request is denied, then an encrypted DNS response pointing to the Umbrella block page will be returned instead.
Taken together, Meraki wireless and Umbrella integration provide a significantly more robust security framework for IT admins looking to protect clients from web threats in a more proactive way. Instead of waiting for a malicious site to infect a machine and then using tools like antivirus to detect and remediate, Meraki MR customers can rest easy knowing that they are protected from ever reaching harmful sites in the first place.
Interested customers should contact Meraki Support to have this feature enabled. This feature requires an early-release MR firmware version that can be enabled with Meraki support assistance.
According to Mary Meeker’s 2018 Internet Trends report, over half of the world’s population is now online, making digital services an essential part of billions of people’s lives. Along with the myriad ways that these services have enhanced our lives, legitimate concerns have arisen over the amount of personal data collected and stored by companies with which we choose to transact.
While the vast majority of this data collection is benign, done by companies so that they can provide consenting users with useful tools and services at little to no cost, everyone deserves to know what information about them is being collected, how it’s being stored and safeguarded, and for what purpose it’s being used.
In light of the General Data Protection Regulation (GDPR) recently passed in the European Union, Meraki introduced a series of tools and updates to the Meraki dashboard that give administrators and users greater visibility and control over the data we collect and use to provide Meraki products.
Today, we’re pleased to announce that these tools and updates have been rolled out worldwide to all Meraki customers.
What does this mean for our customers and their network users? There are six main privacy-focused features we’ve introduced that we encourage you to check out:
Data access and portability: Meraki customers can utilize new features in the dashboard to export personal data.
The “right to be forgotten”: Customers can delete personal data stored in the dashboard, both for their own organization and in response to requests from users of their networks.
Restriction of data processing: In the Meraki dashboard, personal data can be identified, hidden, and removed upon a verified request from a network user to restrict processing.
Tracking privacy-related requests: The dashboard event log now includes functionality for tracking and verifying the status of privacy requests described above.
Consent tools: Enhanced splash page functionality allows Meraki customers to provide notice to, and obtain any necessary consents from, users of their networks for the collection, processing, and storage of personal data.
Data hosting visibility: When creating a new account, Meraki customers have the option to select the region where their data will be stored. For verification, the dashboard now displays the hosting region on every page.
We believe deeply in the importance of data privacy and want all of our customers to be as informed as possible about these product updates. To that end, we’ve set up a webpage detailing the solutions and tools we offer and containing additional information regarding our philosophy to privacy.
For administrators, we also have a new Data Privacy page on our documentation site that explains how administrators can configure privacy settings within the dashboard. Additionally, take a look at our Postman documentation and the API Documentation available directly in the dashboard (Help > API Documentation) for more details about our APIs.
As always, please feel free to visit the Meraki Community to chat about all things Meraki, privacy-related or otherwise.
This week the Systems Manager team released a host of exciting new Apple features and made some interface changes in the Meraki dashboard to make endpoint management even easier, automated, and more powerful.
Interface Changes: Settings Page
Interface changes can be seen on the Settings page, where users set configuration profiles and settings for different device types. The new Settings page has been redesigned to streamline management and make configuration settings more easily discoverable when creating profiles.
We’ve flattened out the previous tile view and added a search bar to help users instantly find the configuration settings desired, or filter and browse settings by supported operating system. This guide offers a full review of these dashboard changes.
New Apple Features
Also on the new Settings page, you’ll see a host of new features available for iOS and macOS, some of these were made available in the Apple iOS 11.3 and macOS 10.13.4 release. These new features are extremely powerful for all organizations managing Apple devices, but particularly compelling for those in education!
Highlights include:
Delay OS updates for up to 90 days on iOS and macOS: Providing time for IT teams to vet and test new OS versions before they are deployed on managed devices.
Keep apps up to date on iOS and macOS: Select for specific App Store apps to automatically update when a new version is available.
Disable Bluetooth settings on iOS and macOS: Limit distractions and security loopholes by locking down the bluetooth functionality on devices through the live tools on a device page. IT teams can use this in conjunction with bluetooth restrictions settings to lock bluetooth settings on or off.
FileVault Personal Recovery Key (PRK) Escrow: Store PRKs for disk encryption on macOS devices.
Login window: Set custom login window messages for macOS devices to alert users of management or convey organizational messages.
Lock screen: Specify a custom lock screen asset tag on iOS to easily identify a device in hand.
App Store Restrictions: Restrict end user app installations and updates for more control of apps and app versions on macOS devices.
AirPrint: Set printer configurations for iOS and macOS devices.
Dock: Change size, magnification, position, minimization effect, and more macOS dock settings.
Setup Assistant: When re-provisioning a macOS device, select to skip steps like Siri setup.
….and more! For a full list, please go to the “New Features” section in the Meraki dashboard.
Current customers can take advantage of these features immediately! We hope you’ll join the Community discussions on this and other topics.
As the needs of our customers and the capabilities of our products have grown over time, so too has our deliberate approach to making the Meraki dashboard as useful and delightful as possible. The Meraki engineering team has been hard at work refining the list pages where you can view all Meraki devices of a particular type (e.g., wireless APs or switches) as well as the detail pages for individual Meraki devices.
We’ve already rolled out most of these changes over the last few months. By May 28, users will see the full set of updates when they log in to the dashboard. Keep reading to see how we’ve enhanced these pages.
Device list page
The device list page now displays a useful summary pane, which gives you an instant look at the status of all of your Meraki devices on the network. For example, you can see how many APs are online and offline, how many are alerting, and how many of your APs are repeaters. This is a small change, but one that we think a lot of customers will quickly appreciate.
Device details page
On the device details page, the map showing the location of the Meraki device is now always visible, no matter which tab of the page you’re on. You can confirm which AP you’re working on without having to toggle to the Location tab. This is especially useful for multi-site deployments.
We’ve also made it much easier to find the RADIUS and VLAN request status on an AP’s details page — it’s right on the summary tab. You can quickly narrow down a connectivity issue to RADIUS, DNS, DHCP, or ARP, or you can click on the LAN tab for more granular information.
Tools tab
Old Tools tab on the left, new Tools tab on the right
Finally, when clicking on the Tools tab, you’ll see all the tools available at one time instead of a dropdown selector. This way, you’ll be able to run and view the results of multiple tools at once.
Please note that after May 28, you’ll no longer be able to revert to the old version of the pages.
Do you have any suggestions for improvements? Feel free to “Make a wish” on the bottom right of any page in the dashboard to get your feedback directly to our engineers!
Early in 2012, a startup company beginning to make waves in the networking industry introduced a new feature for their line of access points. This startup was called Meraki, and the feature launched was Air Marshal. At the time, the functionality satisfied the security requirements of a typical wireless network: automatic containment of rogue APs seen on the LAN, keyword containment of SSIDs, scheduled Air Marshal scanning, and the ability to configure additional APs as Air Marshal sensors for round-the-clock protection.
With the introduction of the MR34 in 2013, Cisco Meraki introduced the dedicated scanning radio and this took the Wi-Fi industry by storm! No longer would admins have to choose between performance or security. With the dedicated scanning radio, the MR was now capable of servicing clients while simultaneously listening to the entire RF spectrum, protecting clients from malicious rogue APs.
The constant surveillance of wireless networks continues to be important, but recent trends in cybersecurity and the growth of Internet of Things (IoT) requires added flexibility when it comes to securing wireless networks.
The Blacklist
No, James Spader won’t be lending his hand to protect your wireless network. But, much like his character on the popular TV show, Air Marshal will work to eliminate (or contain) all SSIDs found on “the list.” TV shows aside, Air Marshal traditionally made it simple to automate containment of rogue SSIDs that are seen on the LAN, or contain SSIDs that matched a keyword.
However, some environments may have a network comprised of multiple vendors, or may be a part of a collaboration workspace where numerous companies may feature their own WLANs, connecting to the same wired network infrastructure. In this instance, automatic containment of rogues seen on LAN won’t work, as the non-Meraki APs would cease to function for their clients.
But administrators no longer have to forfeit their security capabilities. With Air Marshal’s new SSID Blacklist table, rogue SSIDs won’t be automatically contained, but security rules can be configured to match on a variety of conditions allowing for an accessible network to be locked down with finely tuned security controls.
Security rules may match on four different conditions: exact matches, MAC address matches, keyword matches, and wildcard matches. The rules defined in the SSID blacklist table will match against SSIDs that are seen on LAN, as well as Other SSIDs that are “heard” by the Meraki APs but are not found on the LAN. Any matches will result in the MRs within the vicinity of the rogue or other SSID to actively contain the SSID, rendering the offending SSID useless for clients who wish to connect. Exact matches will match on the SSID seen (whether the SSID is seen on the LAN or not), while keyword rules will ignore surrounding characters and match on just the keyword specified. BSSIDs (MAC addresses used to identify a Wi-Fi network) can be matched against if specific radios (2.4 GHz or 5 GHz, for example) that are broadcasting need to be contained.
The wildcard match provides the greatest amount of flexibility. Wildcards can be used to substitute a string of characters with a single *, or a single character with a single ?. For example, an SSID Blacklist wildcard rule may match the following text: ‘*12345’. If the MR detects an SSID broadcasting ‘Guest-12345’, then that SSID will be contained. If the rule is configured to match on ‘Guest-12?45’ and the MR detects an SSID broadcasting ‘Guest-12345’ or ‘Guest-12Z45’, then that SSID will also be contained.
Merely containing the SSID isn’t enough, though. Administrators often want to be cognizant of the rogue SSIDs that are being detected and secured by their MR access points. As such, if the administrator has configured email alerts or syslog in their Meraki Dashboard, they’ll stay apprised of their security rules in action.
Good News, You’re on the (White)List
Seemingly every other day, a new company is featured in the media as being the latest victim of a cybersecurity attack. Wireless networks are often considered the edge of the network infrastructure, the first line of defense in many cases. As a result, many administrators and security teams alike want to automatically contain rogue SSIDs seen on the LAN. While this grants the highest level of security enforcement, interoperability issues may arise when factoring in how often wireless display adapters and IoT devices connect to the network.
In the modern enterprise, HDMI cables are being replaced with Wi-Fi Direct adapters to make screen sharing and video streaming simple and intuitive. In the majority of instances, these Wi-Fi Direct devices (an adapter and client device, such as a PC, printer or remote) will often communicate on their own, freshly created wireless network. Sounds easy enough… except for one slight issue. This isn’t an SSID that’s broadcast by your MR access points, and in no time at all, deauthentication frames are being sent over the air in an effort to protect your devices from the suspected intruder. While the security team is rejoicing, the network administrator is still working to find a way to whitelist these devices so that security can be maintained with just enough flexibility for day-to-day employee operations. Enter the SSID Whitelist table:
The newly familiar faces are all here when it comes to the way that SSIDs can be matched to whitelist from containment. Exact matches, keyword, MAC, and wildcard can all be used. However, unlike the SSID Blacklist table, the whitelist table will not send email alerts or syslog messages when SSIDs are matched.
Alert, but Don’t Touch
There may be instances where administrators wish to be alerted when certain SSIDs are “seen” on the LAN or “heard” in the air, without taking any specific blacklist or whitelist actions. Using the same match conditions available for the SSID Blacklist and SSID Whitelist tables, alerting security rules may also be configured. These alerts will be sent via email and syslog alerts, if configured.
In With the New
Security has been at the forefront of Meraki since the introduction of Air Marshal in 2012. With the latest enhancements made to Air Marshal, new security rules can be configured to match on a variety of conditions, enabling administrators to implement granular security policies that are flexible for the modern workplace. These new Air Marshal features encompass the rapid innovation made possible by the Meraki dashboard. The new Air Marshal enhancements are available free of charge for existing MR customers as part of a seamless Dashboard update. For the SSID whitelist and SSID alerting functionality, the MR network must be set to MR25.9 firmware or higher. Visit our documentation for more information on configuring Air Marshal.
Last week, Active Directory integration was released to all MC networks. For customers that manage their corporate directories through AD, a local server can now be used as a single source of truth for phone users.
Active Directory is the most commonly used directory software in the world, and by supporting it on the MC product line, IT administrators will have one less dependency to worry about when managing their communications system.
As always, this new integration was released right to the dashboard, with no need for additional licensing: just another example of how Meraki continually works to increase the value of our solution.