One of the most important elements in any wireless network is the site survey. Without a thorough survey to determine proper placement of access points, even the most comprehensive network setup could leave users experiencing poor wireless performance. But wireless configuration doesn’t end with the site survey or even soon after – it is an ongoing process as environments evolve. This post will review the Cisco Meraki tools available to help streamline wireless network operation, starting with the site survey and continuing through the life of the network.
Site Survey
The goal of a site survey is to find the best location for access points to provide peak coverage for your environment. During the process, the optimal channel and power levels for each access point are also determined. There are a plethora of tools available for conducting an initial manual site survey, and a Meraki access point can be used with any of them. Even without Internet connectivity, a Cisco Meraki AP can be used in conjunction with any site survey tool to determine optimal AP placement. All you need is a Cisco Meraki AP, a PoE injector, and a gateway device such as a laptop or an MX security appliance. This knowledge base article describes the process step by step.
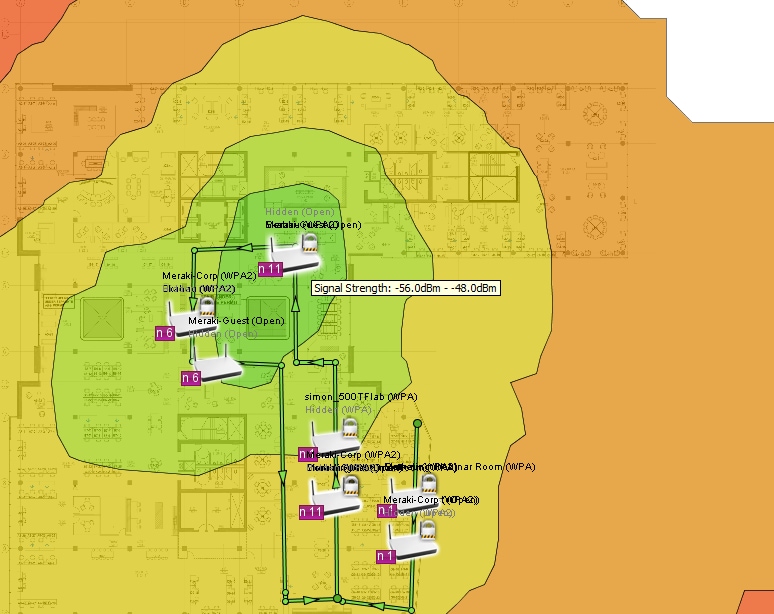
I did a quick tour of the Cisco Meraki office using Ekahau Heatmapper. The image below shows some of the results. By selecting an AP identified in Heatmapper, I can see the received signal strength ranging from very high (green), to poor (red), to no signal at all (white).
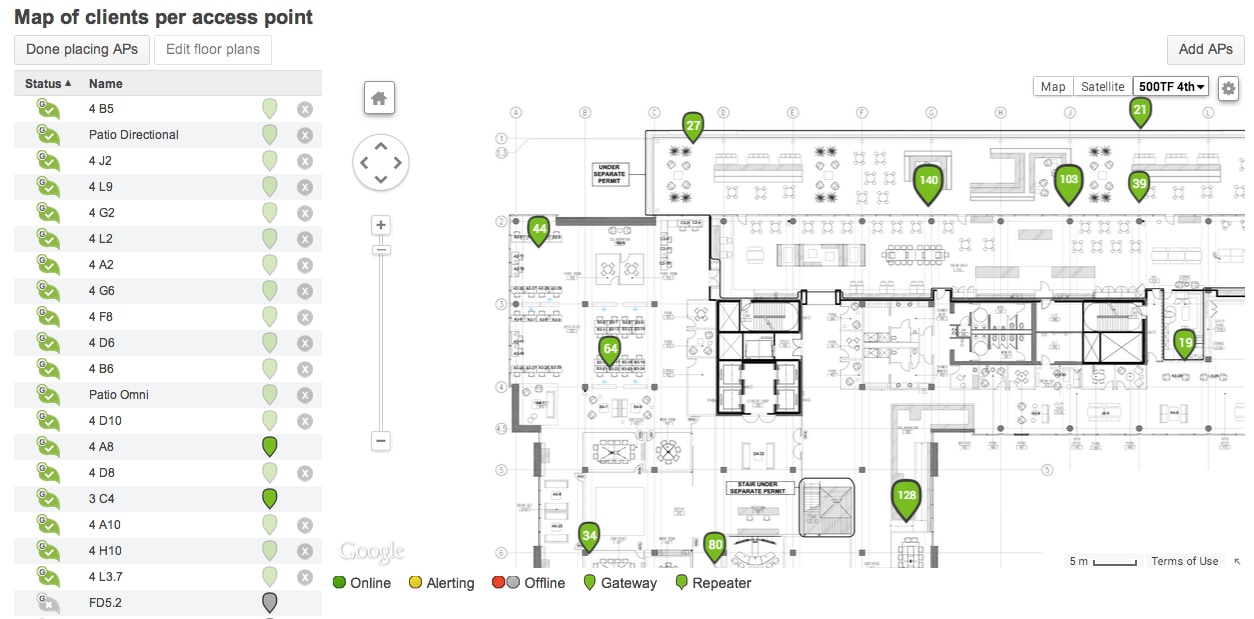
Placing APs on a Map
Manual Channel Assignment
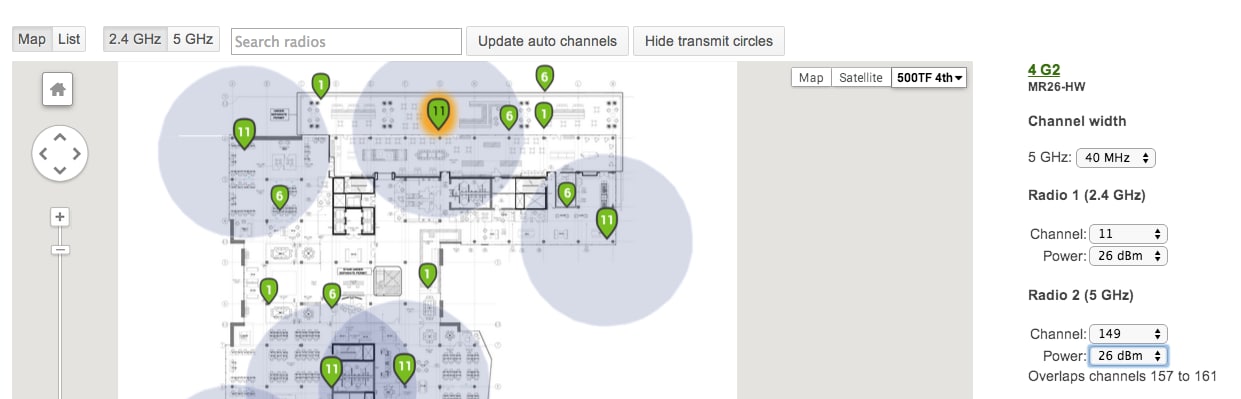
Now that the APs are placed on the map in dashboard, it is easy to assign channels and power levels determined during the site survey. For manual channel assignment, navigate to the Wireless > Radio Settings page in dashboard. Select the newly placed APs, and configure the channel and power settings on the right column. Notice that when an AP is selected for configuration, APs operating at the same channel are highlighted to ensure minimal channel overlap.
Auto RF
Manual channel assignment not for you? Cisco Meraki also has a built-in feature called Auto RF to automatically optimize the channel and power level for any environment. Instead of manually assigning the radio settings, leave the settings at auto. The Cisco Meraki MR18, MR26, and MR34 have a built-in radio just for optimizing their radio settings. Each AP will monitor the RF environment for interference sources and high channel utilization, adapting in real-time to changes in the environment.
Site surveys are crucial, but as network administrators know, they are just the beginning of wireless network management. Cisco Meraki has the tools required to keep a network operating at its best, even after the site survey is complete. For more information, check out these blog posts on getting a network up a running and taking advantage of some of the advanced RF features.